Learning Macro Photography
Macro photography promises to fulfill one of the objectives of photography as an art form: to see the world in a new way; to show the viewer something new and interesting.
If you have any comments on this post, please post them below.
To see more posts on other photographic topics, or to follow my learning progress, please like or follow me on the social media channel of your choice to the right.
A New View – The Objective
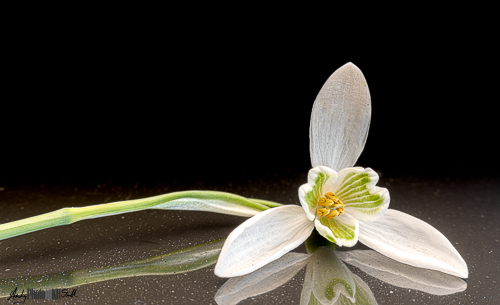
The new view is all about the detail; the detail that is generally overlooked in everyday life. Macro photography takes the viewer inside flowers, face-to-face with insects, or close enough to other objects, to focus on the interesting details that are normally invisible.
Challenges of Macro Photography
Super narrow depth of focus even when using small aperture settings, e.g., f/16 or less.
Small movements appear to be very big – so either a fast shutter speed, or tripod and means of holding the subject steady is essential.
The Aperture-Speed-ISO triad: small aperture and fast shutter speed implied the need for a high ISO. High ISO means noise, which in most macro situations is undesirable. So the forth variable is the amount of light, and for field work, where use of a tripod is impractical use of a flash is often useful.
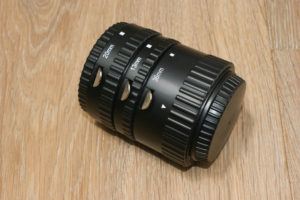
Equipment Used
The only equipment I own for macro photography is a fairly cheap set of extension tubes usually connected to my 50mm prime lens. The optical mathematics for this, which I don’t fully understand, is:
Magnification = Length of Lens/ Length of Extension Tube
So 50mm of extension tube with my 50mm prime should yield proper one-to-one macro. Which seems to be the case.
[See: My Kit]
Focus Stacking in Photoshop CC
The goal of focus stacking is to overcome the depth of field limitations of a lens, to produce an image that is sharp front to back.
Using only standard tools the workflow for this is remarkably easy:
- Take a series of shots with the field of focus gradually moving forward (or backward). In most situations this can be done by having the camera in manual focus (ideally on a tripod) and just turning the focus ring slightly between successive shots. For proper or extreme macro it may be necessary to move the camera itself; ideally but not essentially, on a focus rail.
- In Lightroom Classic CC
- Import images
- Select the series of images with the progressive focus
- Right Click – Edit in – Edit as Photoshop Layers
- In Photoshop:
- select all layers
- Edit: Auto-Align Layers…
- Edit: Auto-Blend Layers…
- Save and close.
Focus-stacking is actually a tricky activity and Photoshop is so impressive in simplifying it to the above steps. The challenges result from the fact that a change in focus, by either moving the focus ring or moving the camera itself, has the side-effect of zooming slightly. So your series of images include differing amounts of the scene being shot, and the “Auto-Align Layers…” command, accessed so easily in Photoshop, has to resize and align these differently sized images.
The “Auto-Blend Layers…” function then has to determine which layer is most in focus at every point in the image. Again easy to say – difficult to do.
Given what I have said in the last two paragraphs, it is easy to understand why this is such a computationally intensive activity. So in the several minutes you may have to wait for these tasks to complete, give a little thought to the ingenuity of the Adobe engineers that make this possible at all!
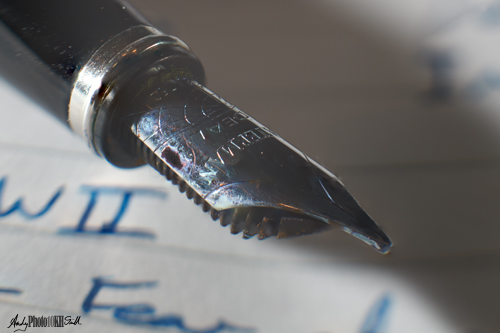
Creation of an Image – Worked Example – “Fountain Pen”
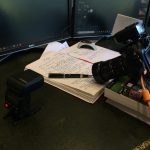
Literally “desk top photography” using the very same desk that I’m sat at now typing this post. Two off-camera flashes, one with a mini-softbox, triggered by the Godox X1 T(S). Camera with with the 50mm f/1.4 prime and 50mm extension tubes, explained above; shot at f/16 to give a reasonably deep depth of focus without the risk of the distortion from very small apertures. Tethered to Capture One on my main desktop computer (on same desk as rest of the rig).
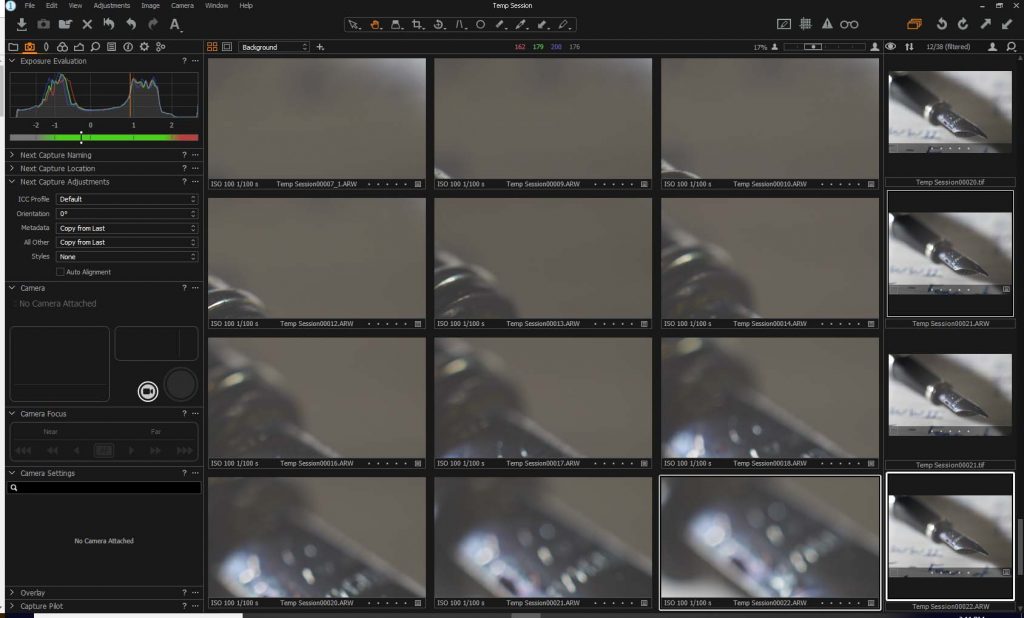
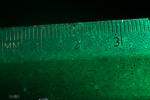
By carefully moving the books back a millimetre, or so, at a time. I managed to collect a set of 12 images of the pen nib with varying focal planes. See Capture One screen shot below.
Merging carried out in Photoshop, as explained above, very easy. I did experiment with the “Merge to Panorama” option, as my images did not neatly align. DON’T DO THIS. When merging to a panorama, Photoshop expects the source images to be broadly all in the same focal plan. My results were horrible.
After “Auto align layers”, “Auto blend layers” with “Create stacked image”!
Resulting image below …
In hindsight:
- Fewer images were probably needed
- A macro-rail would have made the process much more controlled than the somewhat random nudging my pile of books back a millimetre at a time.
Why the Definition of Macro is Ridiculous in the Digital Age
[Techno-rant warning] The definition of macro photography is derived from the days of film photography where an image was deemed to be macro if the image on the negative were the same size or larger than the subject in real life.
So, in the digital age:
- If you have a full-frame camera with a sensor width of 36mm, an image of 36mm in real life which fills the entire frame is deemed to be macro.
- If you have a camera with an APS sensor (width 24mm), take the same shot of a subject 36mm across such that it completely fills the frame, this is not deemed to be macro.
Now, if both cameras have the same pixel count, say 24 megapixels, the image files produced will, to all intents and purposes, be identical. So surely it is ridiculous to say that the first image is macro, and the identical second image isn’t.
What Next?
I certainly intend to revisit this post, after I have purchased a macro-rail (micro positioning plate) to replace my pile of books, and/ or a proper macro lens.
In the meantime, if you have any thoughts or comments, I would love to hear them. So please comment below.
And, please follow me on the social media channel of your choice, by clicking on the icons to the right.
Thank you.