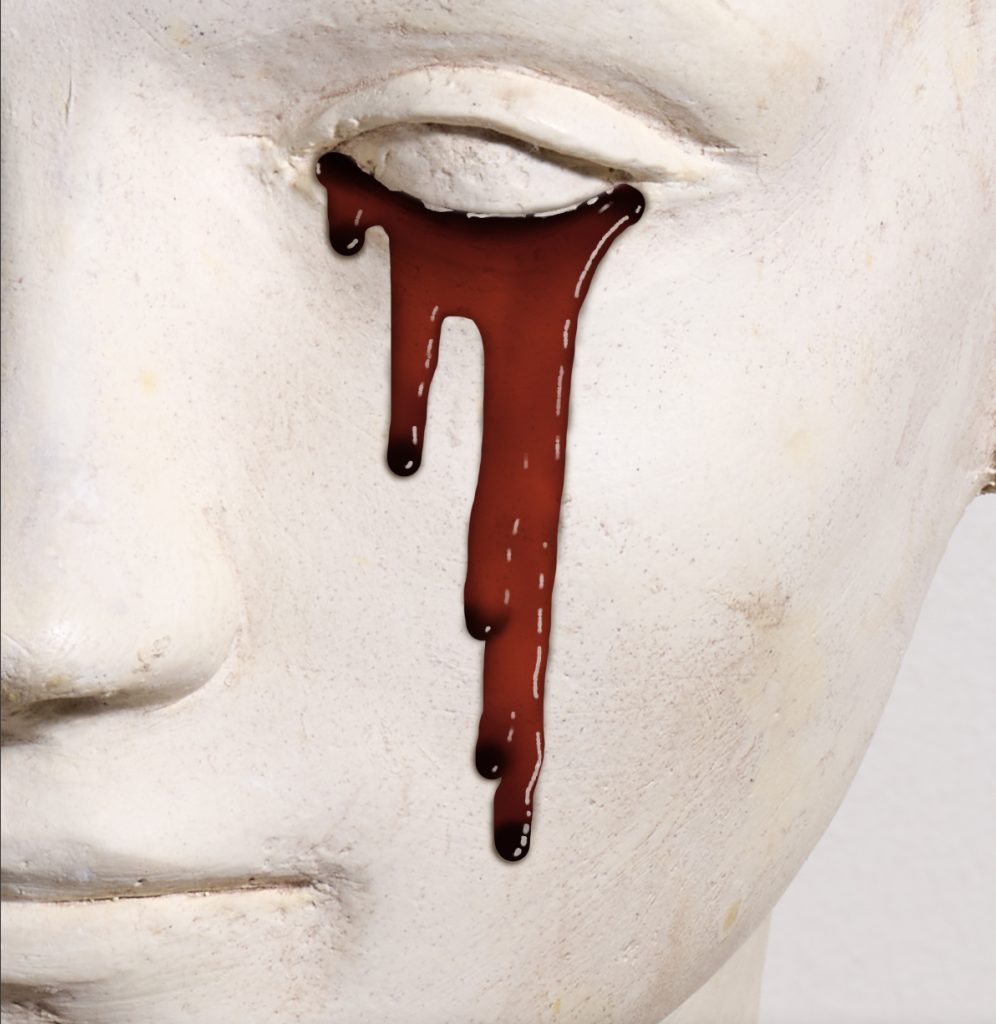
Creating the classic horror effect of blood from the eye in photoshop. Or in the case above perhaps the biblical blood from a stone.
This post is based on the excellent YouTube from Envato Tuts+ “How to Make Blood Effects in Photoshop” who in a very short video shows how to make an image similar to the above, and a whole lot more. The purpose of this blog is to record the steps in a more measured way; for my benefit as much as anybody else. Steps as follow:
- Create a Colour Swatch
- Drawing the Blood Base
- Blood Flow Brush
- Shadows
- Creating a Custom Brush
- Highlights
- Surface Highlight
- Final Blood in the Eye
1. Create a Colour Swatch
From the Window pull-down in Photoshop ensure that “Swatches” is ticked. If new, drag it into a panel for convenience
Click on the folder icon to create a new swatch, then the plus button to add colours: Black; Dark Red, Medium Red, Light Red and White

2. Drawing the Blood Base
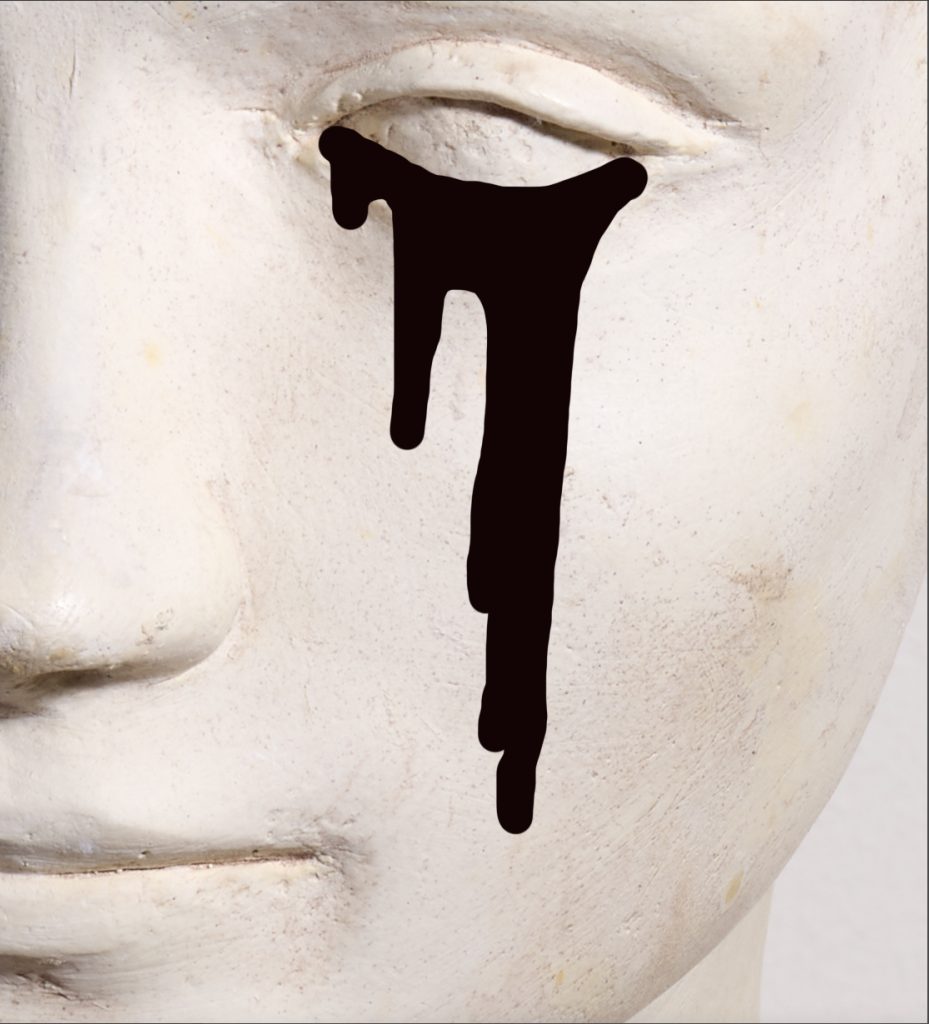
Create a new layer, “Blood Base”, and set the blend mode to Multiply
Using a standard hard round brush of c. 40px and 100% opacity and flow with Dark Red as defined above (just click on the newly created swatch), draw the shape of the blood
The objective is to get the outline of the blood in its most viscous form
I admit this looks like rubbish – stay with me
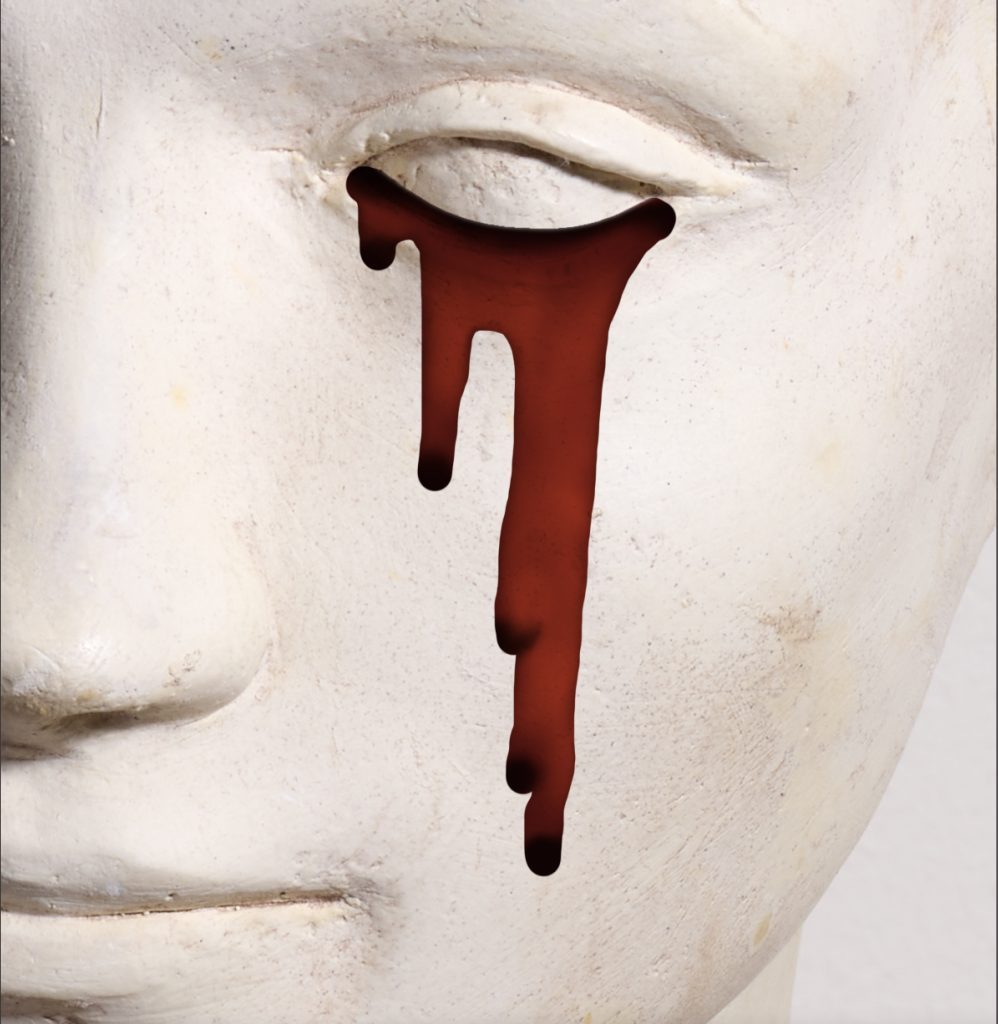
3. Blood Flow Brush
Create a new layer and clip it to the Blood Base layer below
With a soft round brush, 100% opacity and flow, Medium Red Colour, fill in most of the layer apart from the ends of the drips and the area the blood is flowing out from
Then on another clipped layer, use a small round soft brush with flow set to 10%, colour Light Red, thin out the areas of flow
The objective is to show the flowing, thinner layer of blood as lighter
Finally, add a further clipped layer layer just to refine the shape of the blood and probably reduce opacity of this layer
4. Shadows
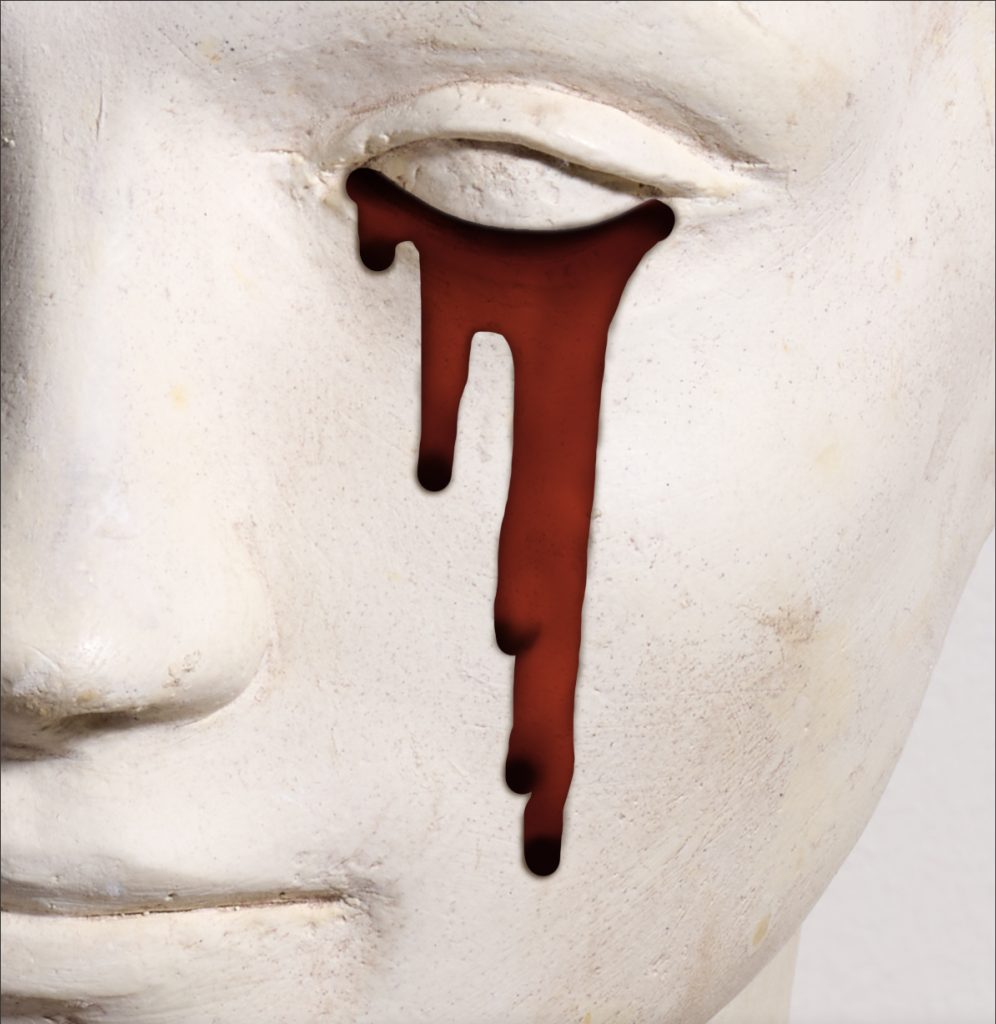
Add a new layer under the Blood Base, with blend mode set to Multiply
Soft round brush, c. 20 px, flow 10%ish, select a shadow colour from the underlying image
Paint in shadows which will be cast only by they heavier parts of the blood, i.e., mainly the tips and the source
To avoid painting over the blood flow, select (Command/ Ctrl Click) the Blood Base layer icon and invert
Command H is useful to hide the distracting marching ants of the selection, but remember that there is still a selection until deleted
5. Creating a Custom Brush
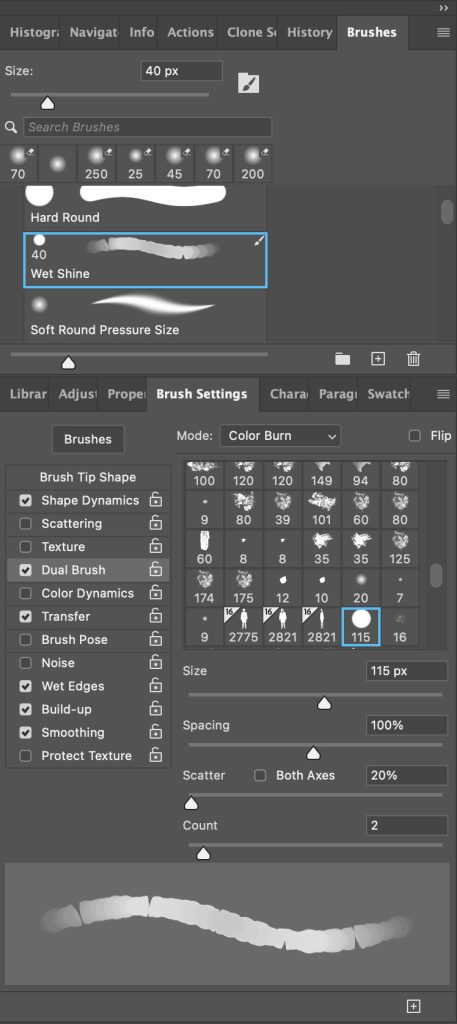
Start with a Hard Round brush and make the following adjustments:
- Brush Tip Shape
- Round
- Size = 40px
- Hardness – 100%
- Spacing = 16%
- Shape Dynamics
- Size Jitter = 50%
- Dual Brush
- Hard Round
- Size = 115px
- Spacing = 100%
- Scatter = 20%
- Count = 2
- Transfer – checked
- Wet Edges – checked
- Build-Up – checked
- Smoothing – checked
Click the the plus button in the bottom right of the panel to create the new brush; name “Wet Shine”
6. Highlights
This is arguably the most important stage, where the red blob begins to look like a shiny liquid
Create another layer clipped to the one below (and ultimately the Blood Base)
Select the new Brush, set the size to about 5px – although you may want to vary this a bit, bigger and smaller; colour white, and paint on some highlights
7. Surface Highlight
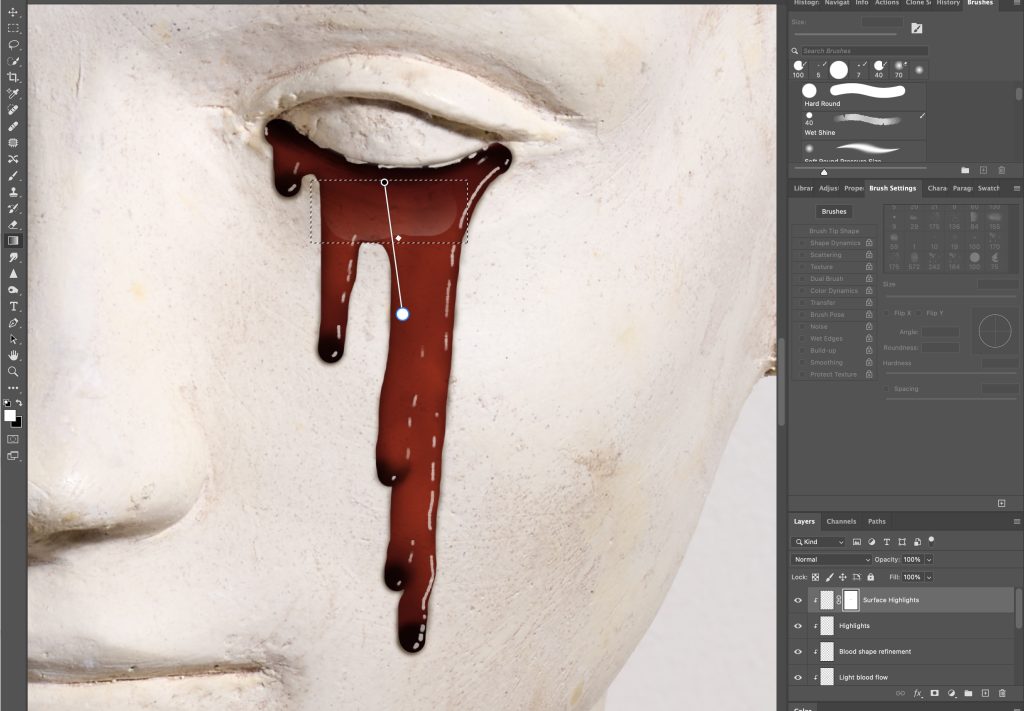
Another clipped layer, paint on some wide highlights using the new brush set to a much bigger size, paint across a larger area
Mask the layer. With the rectangular marquee tool select the newly painted area and pain a gradient for that highlight on the mask
Repeat across the larger areas of blood
Reduce the opacity of this layer until it looks believable
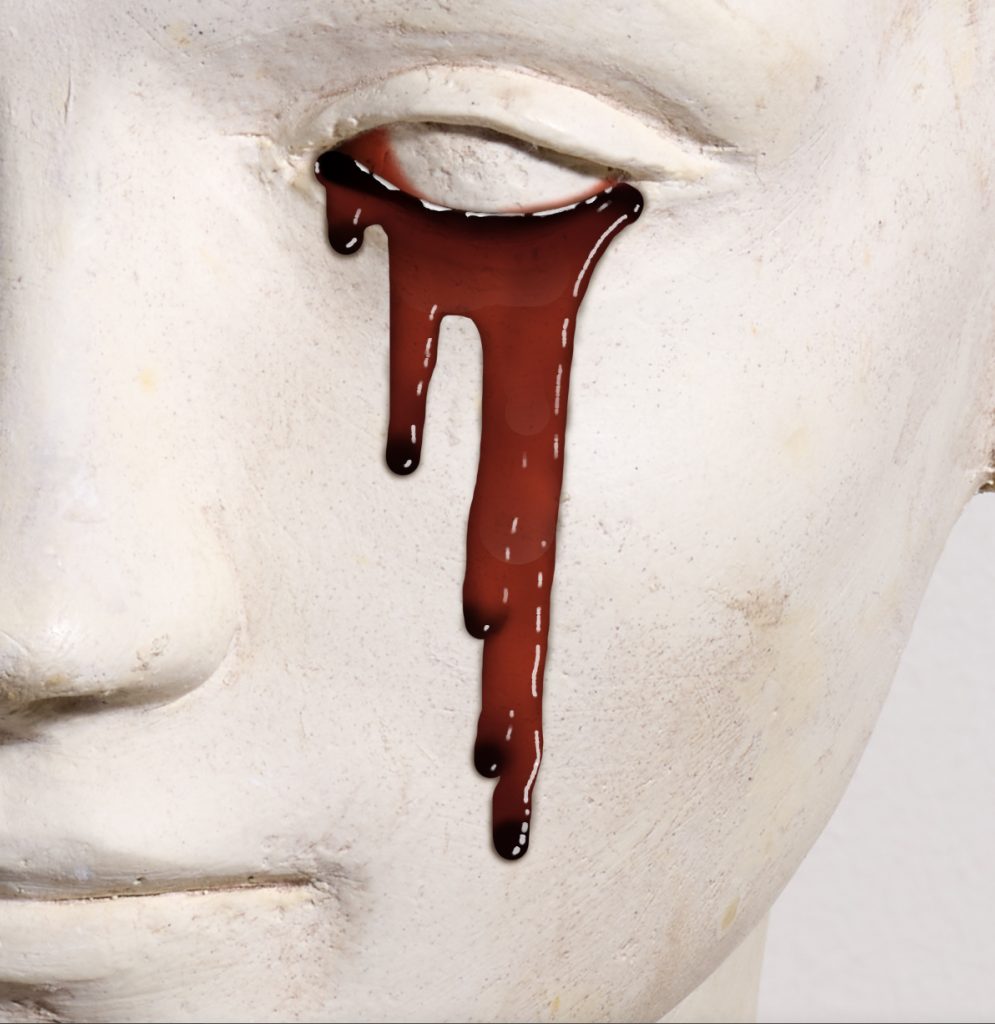
8. Final Blood in the Eye
Add a new layer underneath all the other blood layers but above the background layers
Using the pen tool, or whatever, create a selection for the corner of the eyes with a feather of about 3px
Fill with light red. Then set the blending mode for the layer to Hard Light or whatever looks good.
Create a solid black layer clipped to this layer and mask with a radial gradient so that you create a gradual darkening of the blood from the white of the eye to base of the blood
The key to the reality of this technique is the shadows and highlights. The above is only my second attempt. So please do not judge me too harshly!