hours 50 to 800
First Revision: Processing Workflow
My first “Post-Processing Workflow” post was in November 2017 after 0-50 hours of my 10,000 hour project: Learning the Art of Photography. Since then I have completed over 700 further hours of deliberate practice and have adopted a Capture One Lightroom and Photoshop workflow as follows:
- For RAW conversion, image selection and initial processing I start with Capture One Pro 11 (for Sony) – See post: “My Introduction to Capture One Pro Sony 11“
- Tethered Capture whenever possible
- Star-based image scoring system
- Capture One Styles and Presets
- Transfer of Selected Images to Lightroom Classic CC for
- further manipulation in Photoshop
- export as a JPEG and to social media channels
- filing and long term storage
- Selected RAW files stored in the “Selects” folder – one big folder but sorted by date.
As with most, if not all, of the processes being developed through my 10,000 hour learning project, this is a work-in-progress, and if you have any suggestions or comments I would be grateful to hear from you. Please either leave comments in the box below or connect with me through the social media channel of your choice, right.
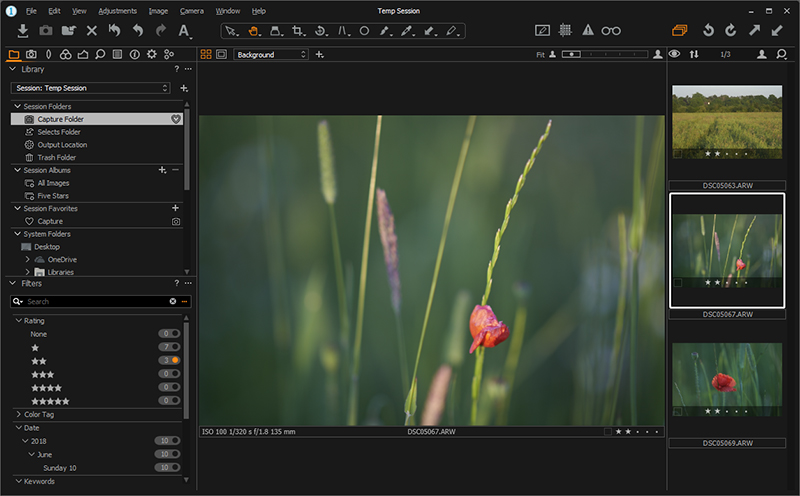
Image Selection in Capture One Pro
Capture One Pro is designed for managing multiple session, which is probably useful if you are using Capture One to manage the storage of your images. I am using Lightroom Classic CC to manage image storage, so use only one session which I, rather unimaginatively, have called “Temp Session” so the system set up the following folders:
- “Temp Session/ Capture” – files direct from either the camera’s memory card or direct from tethered capture
- “Temp Session/ Selects” – long term storage of RAW images and adjustments, see below
- “Temp Session/ Trash” – for deletion
- “Temp Session/ Output” – Watched by Lightroom CC for automatic import, see below.
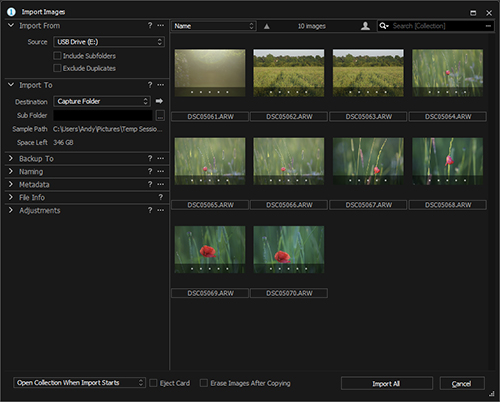
When a memory card is inserted into the card reader of a computer running Capture One, the import dialogue box opens enabling images to be transferred to the Capture folder. (See alternative below for Tethered Capture).
Capture One is very fast and enables comparison of adjacent images to be carried out very efficiently, i.e., without any perceptible delay waiting for images to load. First pass, I’m looking to delete images that are either
- out of focus
- otherwise obviously not up to scratch
- the lesser of multiple similar images.
Two star images get initial processing, i.e., cropping, global and local toning, spot removal and colour correction/ colour toning.
Images are then recategorised as three stars, i.e., good for this purpose, so only as many images as are eventually required get this ranking; otherwise one star for eventual deletion.
Tethered Capture in Capture One Pro
Tethered capture was one of my primary motivations for adopting Capture One over Lightroom Classic CC. (see my post “My Introduction to Capture One Pro Sony 11“). Capture One is designed specifically for studio use by fashion and beauty photographers. So tethered shooting is very much at the heart of the system, rather than “a bit of an add-on” which is how it feels in Lightroom Classic CC (even if it did support Sony cameras, which it doesn’t).
Star-Based Image Scoring
Non-graded images are automatically assigned a status of Zero stars, which I treat as a category in and of itself, i.e., “image to be graded.” I then assign star points as follows:
- “one star” – reject to be deleted
- “two stars” – worthy of further consideration, i.e., on the shortlist
- “tree stars” – worth keeping, will get saved in lightroom, stored on Flickr and possible Facebook and/or Instagram
- “four stars” – for entry into competition, or one that previously scored well
- “five stars” – a winner, must have at least scored a 20 in a SPPC competition, is worthy of entry in an external competition. The set of five star images is effectively my Dynamic Portfolio.
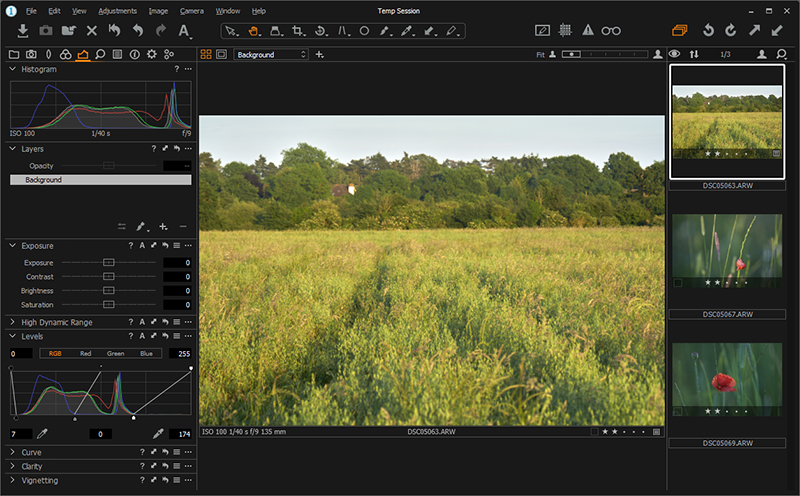
Global Editing in Capture One Pro
Toning
Tone adjustments, like many others in Capture One Pro, are more similar to those found in Photoshop than Lightroom. In particular, there are sliders for:
- Exposure
- Contrast
- Brightness
- Saturation
- Highlight (recovery) – Under High Dynamic Range
- Shadows – Under High Dynamic Range
- Clarity – adds definition to the mid-tones, but as with the Lightroom implementation, if applied at greater than 30/100, is prone to creating halos around areas of high contrast
- Structure – similar to Clarity but affecting extremes rather than mid-tones. Good for adding definition to images which require sharp edges such as architecture..
Then Photoshop style tools for Levels and curves, which now I have become used to them are very natural.
White Balance
The White Balance tools on Capture One Pro are broadly similar to those of Lightroom Classic CC, they just seem a little more controlable. In lightroom I often found that minor adjustments made a radical change, this is less noticable in Capture One Pro.
Split-Toning and Colour Editing
The tools for colour editing in Capture One Pro are more flexible and detailed that those provided by Lightroom Classic CC. For example it is possible to set different colour adjustments (or white balance) for highlights, mid-tones and shadows.
I generally start by looking at presets for the colour editors. This allows me to swap between alternatives in less than a second. So I see the scope of possibility very quickly, and can identify an approach. Then by looking at which settings have been altered, can fine tune to obtain the result I’m looking for.
Colour toning can also be applied selectively through masked adjustment layers, as described next.
Local Editing in Capture One Pro
Capture One works very much more like Photoshop than Lightroom in that it achieves local edits by way of new adjustment layers which are masked to apply the effects only where required.
By using a low opacity brush on an adjustment layer’s mask, it is possible to literally paint in the effect one is looking to achieve. In the simplest form this can be dodging and burning. If you make a mistake or think you have overdone the effect, you either reverse the effect of paining in the mask by using the erase brush, or lower the opacity of the adjustment layer as a whole. Just as one would in Photoshop.
Cloning is still better done in Photoshop at at later stage, See “Processing in Photoshop”.
Styles and Presets
Capture One Style are setting across a number of tools, and Presets relate to a single tool. For example, I have implemented the colour themes discussed in my “Colour Theory – First Learnings” post as Presets for the Colour Editor tool. This enables me to quickly try out alternative radical colour themes without changing any of the other setting. Once selected, further adjustments can be made.
Capture One comes with a teaser set of Styles and Preset with others available to purchase from Phase One or third parties.
Transfer to Lightroom from Capture One Pro
I have set up a Capture One process, “Export to Lightroom”, this based on the standard Output process and produces a 16 bit TIFF files from the RAW images selected and saves them to the “Temp Session/Output” folder, which is watched by Lightroom. The TIFF files are relatively large as they contain all the information of the RAW file (14 BIT) plus all additional layers and processing.
The fact that Lightroom is “Temp Session/Output” folder means that any files added are automatically imported into Lightroom and can be viewed as “Previous Import” in the Library.
The net effect of the above two processes is that I merely select my 3 star images, go to the Processes tab, the Export to Lightroom option is usually selected as this is the only process I use on a regular basis, hit the “Process” button. Wait a couple of minutes for the process to complete. The go to Lightroom and look at “Previous Import” where the new images magically appear.
Lightroom Classic CC Processing
The First Rule of Lightroom
In my previous post, I advise: “If using Lightroom for anything, use Lightroom for everything.” In the context of a hybrid workflow, I would update this to: “Once an image has been moved from Capture One to Lightroom, there is no going back.”
The first thing I do is move the imported files to appropriate folders and collections. I do all this in Lightroom, so that it maintains a record of were everything is.
Processing in Photoshop
Key steps:
- Cloning out undesirable elements
- Sophisticated dodge and burn or other toning
- Possible colour editing or effect application
- Final sharpening using Smart Sharpen and the Unsharp Mask
- Adding borders and resizing if required for PDI competitions.
Export as a JPEG
Lightroom is particularly capable when it come to the production of JPEGs to a specific resolution/ size, with watermark and copyright information automatically included.
Output to Social Media
Flickr
Generally speaking, I store all images that achieve a 3 star ranking or higher in a Flickr Album. For each image on Flickr I add a reference, in the description, to the Journal Entry on this site for the day it was:
- shot
- processed (if substantially different)
- judged at competition (where relevant).
I link most images on this site to higher resolution versions on the Flickr site.
The current Photo10kh Flickr Site has over 1,400 images after approximately 750 hours of project time.
I use Facebook Albums for sets of images that I want to share with a specific group of people. For example, following the Stoke Poges Photographic Club’s recent trip to Bekonscot model village and railway, I used a facebook album to share my images with other members of the club.
The current Photo10KH Facebook Page has about 400 or 500 images in 25 albums.
I like Instagram as a way to showcase my current work. Since Instagram displays thumbnails in rows of 3, I try to upload images in 3s that look good together to create a cohesive collection. This is a useful discipline when learning the art of photography.
The current Photo10KH Instagram Site has 125 images, as of writing.
Social Media Export from Lightroom
Lightroom Classic CC has excellent in-built and third party social medial management tools that allow images to be stored at the specified resolution, watermarked and with the appropriate copyright metadata.
Long Term Storage and Categorisation
Images imported from Capture One will all have a 3 star rating or higher. I store images for potential use in projects or competitions in a structure of Lightroom Collections that I have developed. I then select top candidates for a competition or project, and upgrade them to 4 stars, with back-ups remaining at 3 stars.
I award my current top images, usually those that have been successful in competition, 5 stars. Over time previous “top images” will be replaced, superseded or just fall out of favour, and will be down-graded to 4 stars. My goal is to have 20-50 5 star images at any time to represent my dynamic portfolio.
RAW File Storage and Clean Up
In my “My Introduction to Capture One Pro Sony 11” post I was unsure of how to manage the storage of the RAW files of selected images. I currently manage this by selecting all my 3 star images and move these to the “Session Selects” folder for long term storage. It is only in exceptional circumstances that access to these files will be necessary. In fact theoretically, all the information in the raw images is stored in the TIFF files. So no access should ever be required. However, I keep them “just in case.”
One star images are moved to the “Session Trash” folder where they can later be deleted. By this time there should be no images with either no or 2 stars, as these are intermediate processing stages, and the “Temp Session/Capture” folder is completely emptied by the end of each processing session.
Please Help
My goal is to learn, if you have any comments, please post them below.
To see more posts on other photographic topics, or to follow my learning progress, please like or follow me on the social media channel of your choice to the right.