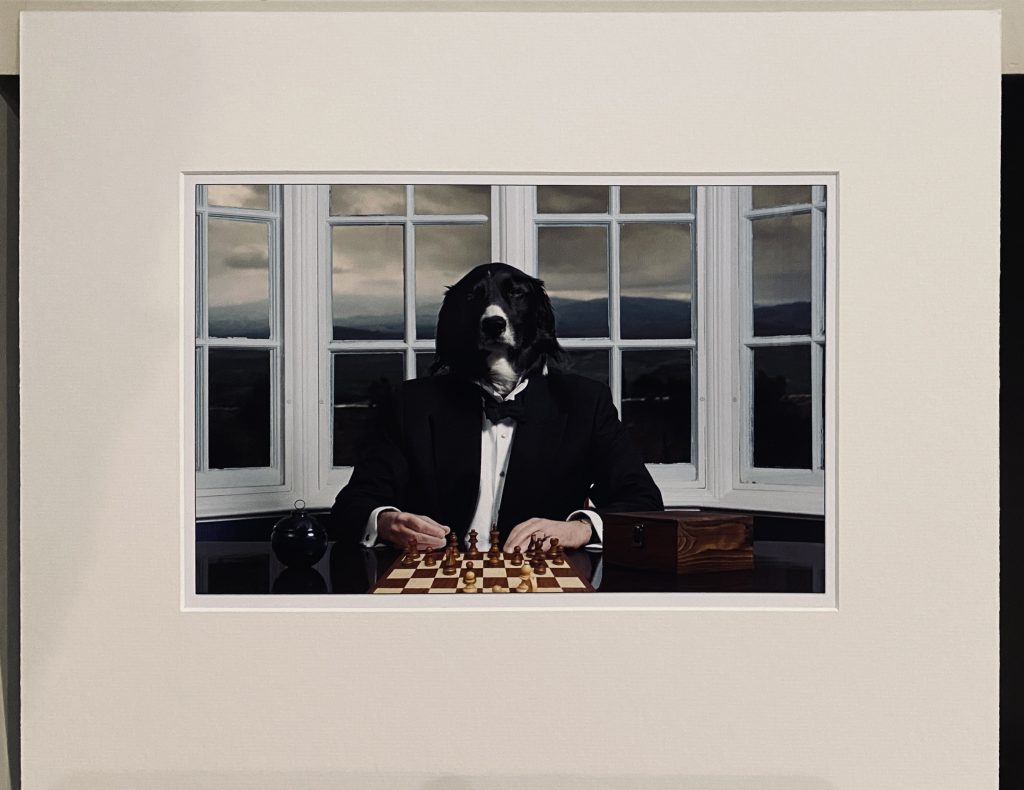
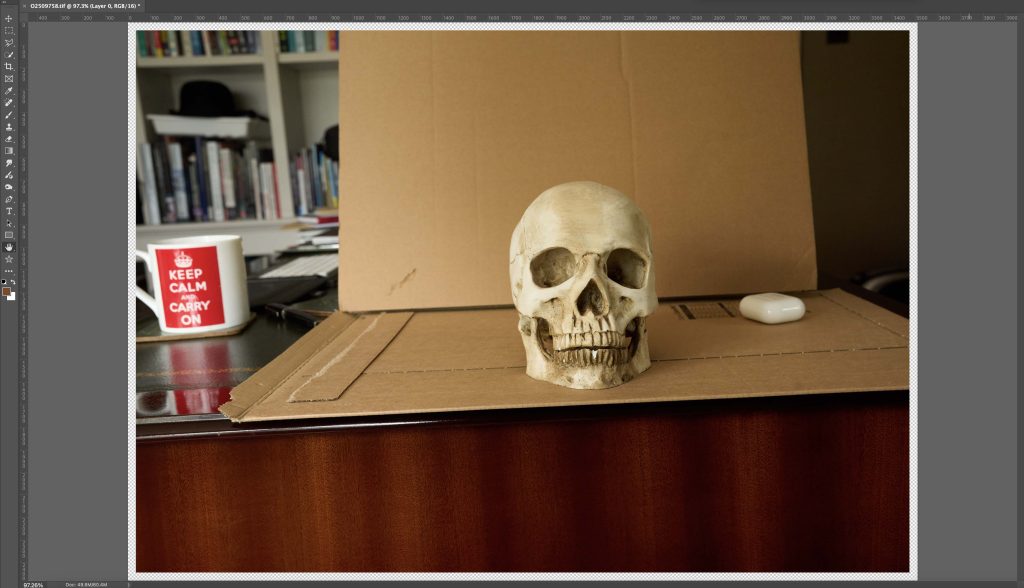
In Camera Club print competitions it sometimes happens that the printed image and it’s accompanying PDI do not match. Often this is because the mount covers the outer edges of the print and spoils the crop which looks perfect in the PDI. This post aims to show how to use Photoshop to prepare files for printing and PDI so that the desired crop is retained in both Print and PDI. An easy way for a pre-cut mount “to fit and A4 Print”, a slight variation on the easy way, and a cool way as pictured above which works for any shape and size print and aperture, even if you cut this yourself.
Basic Requirements for a Print Competition
Mounted print, maximum size 500x400mm. Smaller sizes are allowed, but unless there is a very good reason to the contrary, 500x400mm is best for portrait, landscape or square images of any size.
500x400mm mount board is available from a number of suppliers, e.g. Brampton Framing, with a pre-cut aperture “to fit an A4 item”. However, in many cases the aperture is actually slightly smaller than A4, e.g., 204 x 291mm (A4 is 210 x 297mm). This means that if you print your image A4 you’ll lose the edges and your image is no longer perfectly cropped, picture elements are too close to the edge or cut off when they shouldn’t be.
Don’t worry, 2½ solutions using photoshop below:
The Easy Way
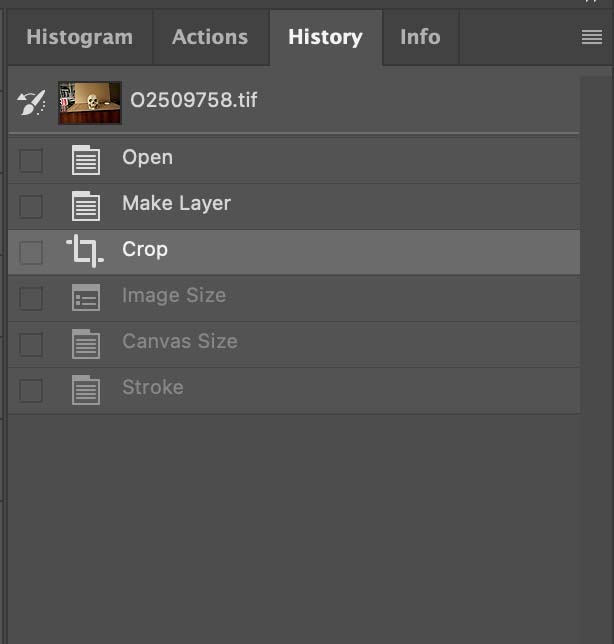
Open A COPY of your photograph in Photoshop. Do not risk overwriting the original with the lower resolution version we are about to create for printing and PDI purposes only. We are about to discard all the layer information and reduce the resolution. So make sure all of this is retained in a separate master file.
Step 0) If your Layers Panel just contains the Background layer, double click on it, and OK the prompt to turn it into “Layer 0”.
If you have multiple layers, “Flatten Image” first, option in the menu top right of this panel. Will create a “Background” layer, then follow steps above.
If you already have just one layer (not “Background”), then you’re good to go.
5 Easy Steps:
1) Crop your image to the shape of your aperture, e.g., 204×291 for portrait or 291×204 landscape – you need to type these numbers into the ratio box, see right
Drag out the shape and crop as normal
Ensure “Delete Cropped Pixels” IS TICKED

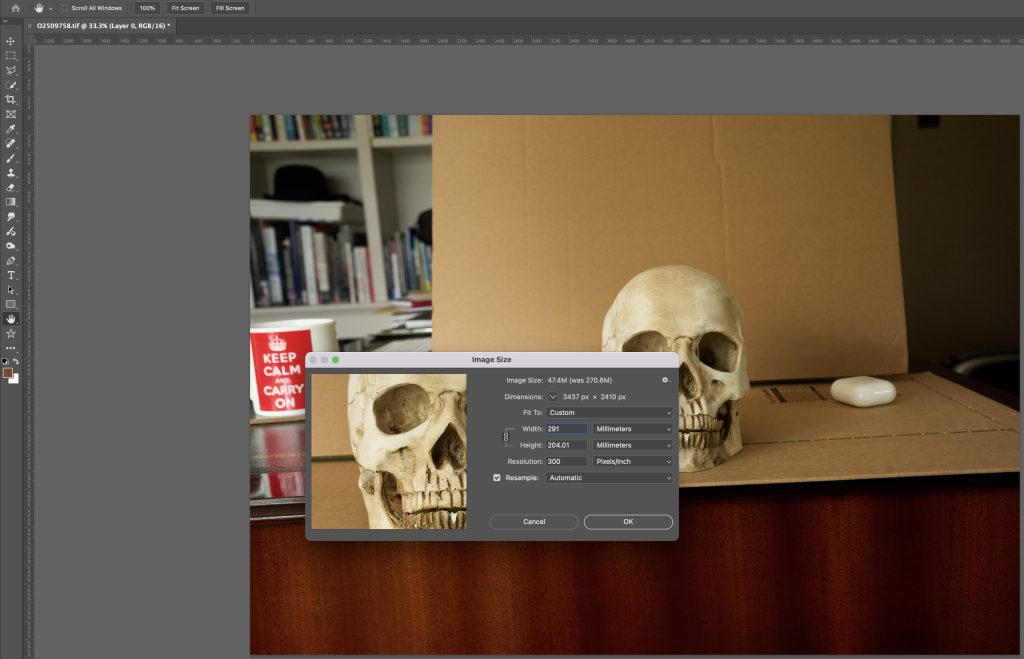
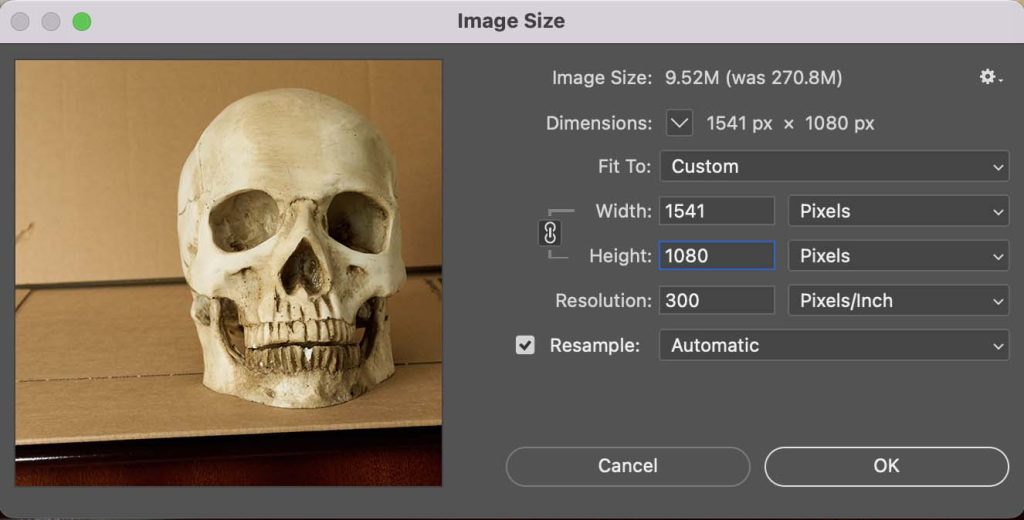
2) Change Image Size (from the Image pulldown menu) to the required size:
- width 291 “Millimetres” for a landscape image
- height 291 millimetres
- the other dimension will change automatically and don’t worry about an extra 0.01mm or so
- resolution of 300 DPI, as below:
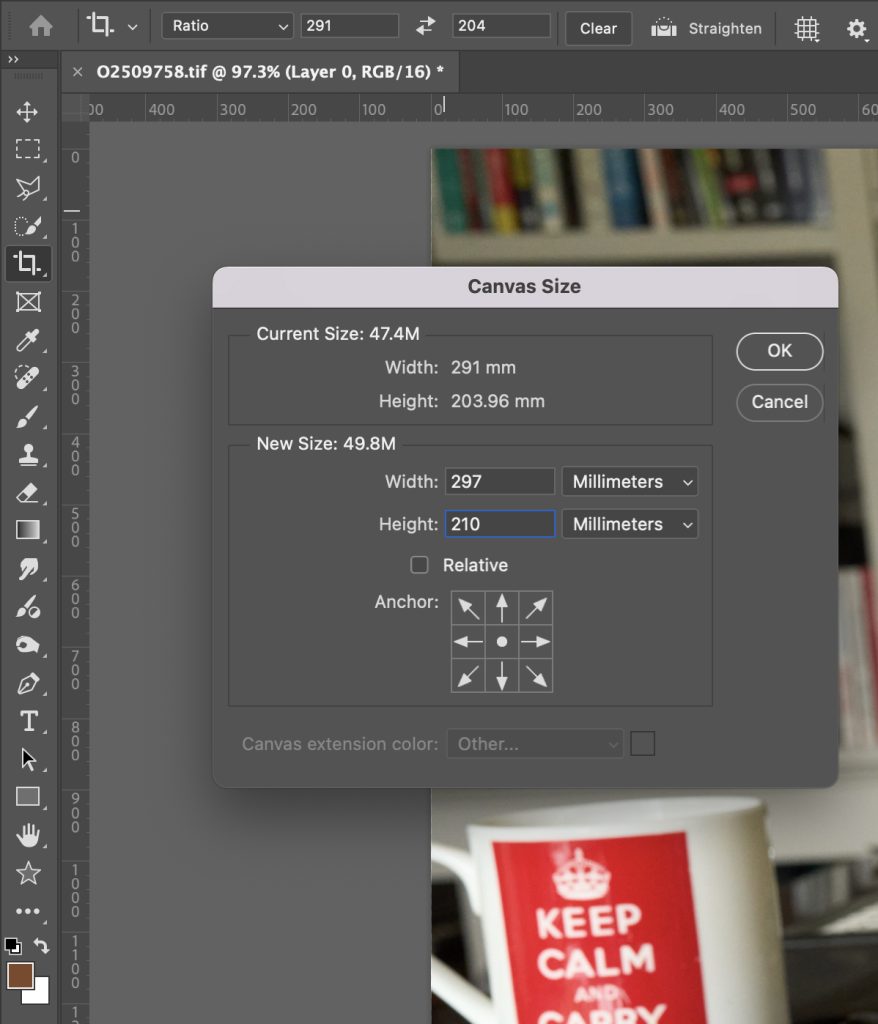
3) Increase the canvas to the size of the paper you intend to use, e.g. A4 297x210mm (this is the most economical but can be a bit fiddly as you only have 3mm of overlap) – A3 paper is 420x297mm or you could use any size in between. Image pulldown menu “Canvas Size”
Results as below. Note: transparent edge to the picture
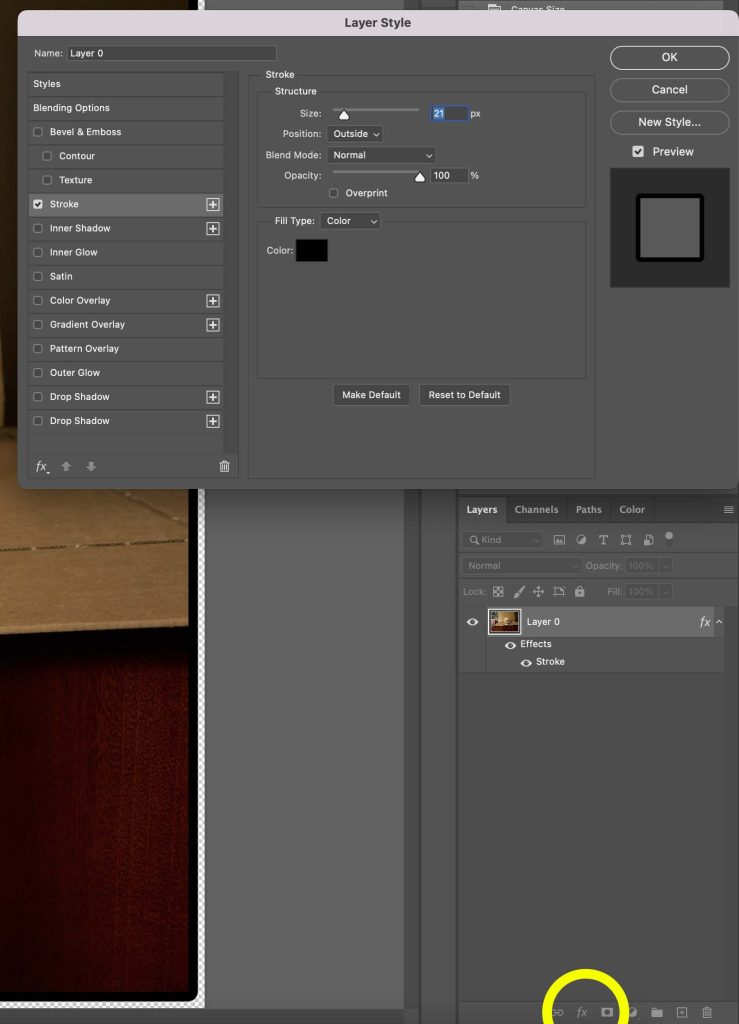
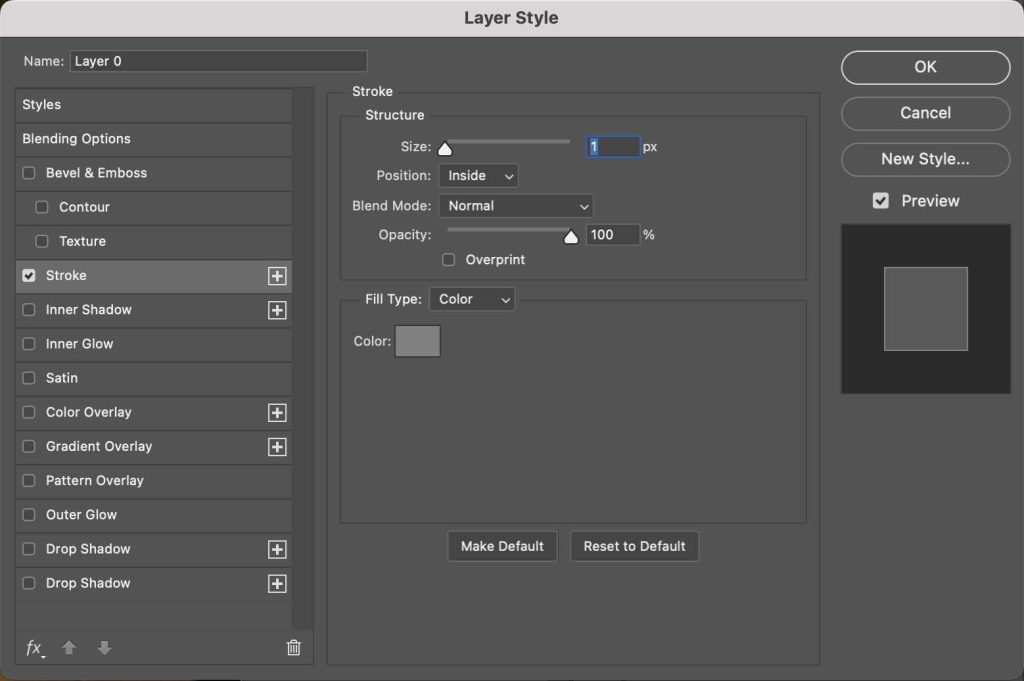
4) put a thick black (or any other colour) line around the outside of the image. Click on the “fx” menu (circled in yellow below) and select “Stroke” to bring up the Layer Style panel pictured. Set the parameters, broadly as follows:
- size: 20
- position: outside
- blend mode: Normal
- Opacity: 100%
- Fill type: Colour
- Color: black (for low key images; most images); white for high-key (mainly white) images; match colour where there is some other dominant colour
This black boarder should be hidden under the edge of the mount, but if a little peeps through, you want it to be as unobtrusive as possible.
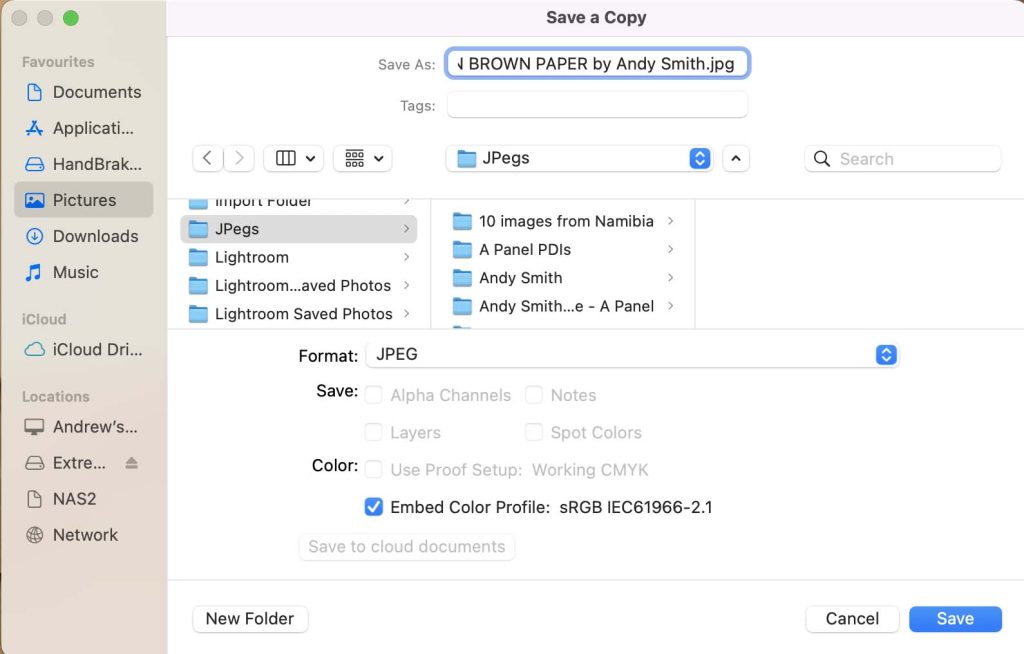
5) “Save a Copy…” from the file menu as below.
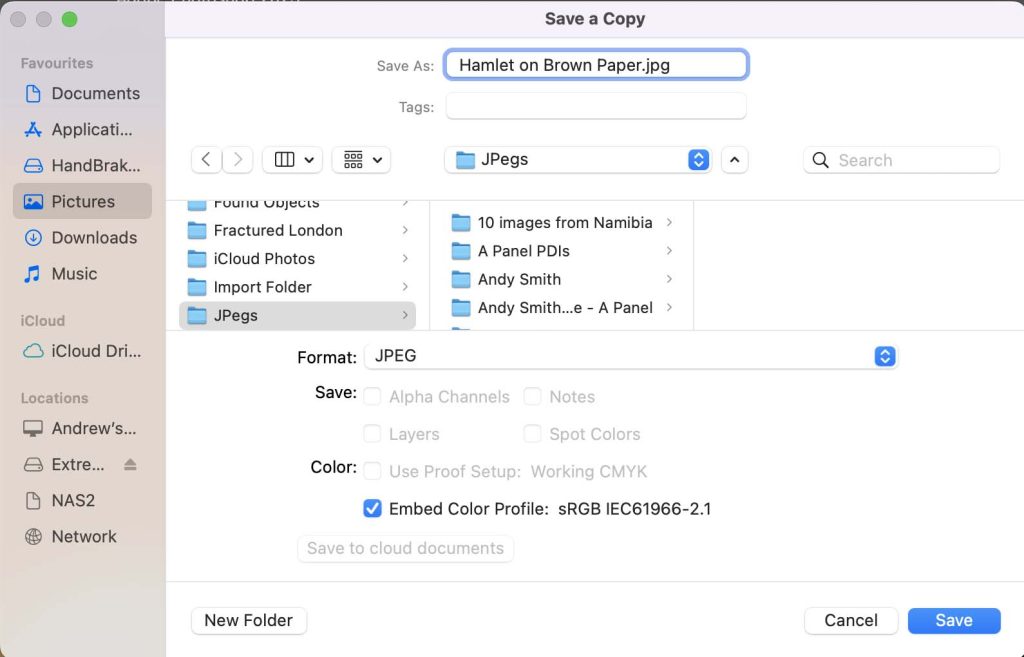
The JPeg you have just produced is:
- perfectly sized for A4 printing at 300dpi (the resolution that most commercial printers ask for)
- will have a thin white line around the edge, then a black line surrounding your image (or other colour if you selected a stroke colour other than black)
- your image will fit perfectly in the “A4” aperture in your pre-cut mount
Hurrah!
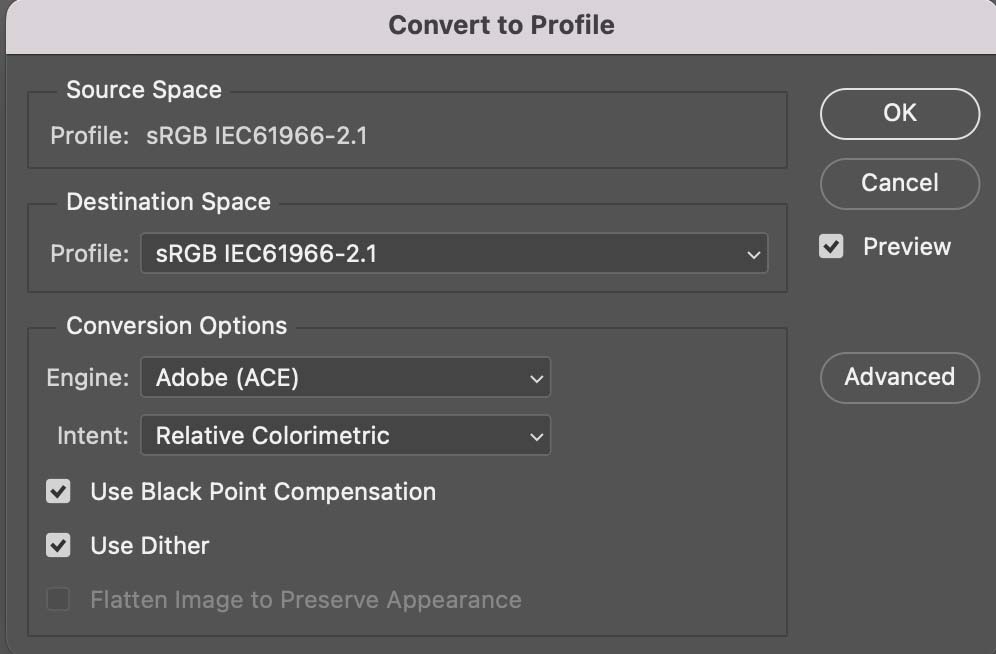
Note: If the Embed Color Profile is not sRGB, i.e., as in the above (camera phones in particular always use strange colour profiles), change it before saving by selecting “Convert to Profile”, 5th from bottom of the Edit menu, and change the Destination Space profile to sRGB as in the picture, right, and hit OK. Then “Save a Copy…” as above.
Before you close Photoshop – let’s produced the accompanying PDI for projection
Max dimensions for SPPC competitions are 1920x1080px, which means that for an A4 image, height is going to be the constraining dimension, even for landscape images.
4 steps, A to D as follows
A) Use the History panel to reverse all changes made to the file until just after you made your crop selection. The image is still at full resolution at this time, but the selection is exactly what is going to appear in the aperture of your mounted print.
B) Change “Image Size” to Height: 1080px (Width with automatically adjust to something less than the maximum of 1920
Note: units this time in pixels NOT millimetres
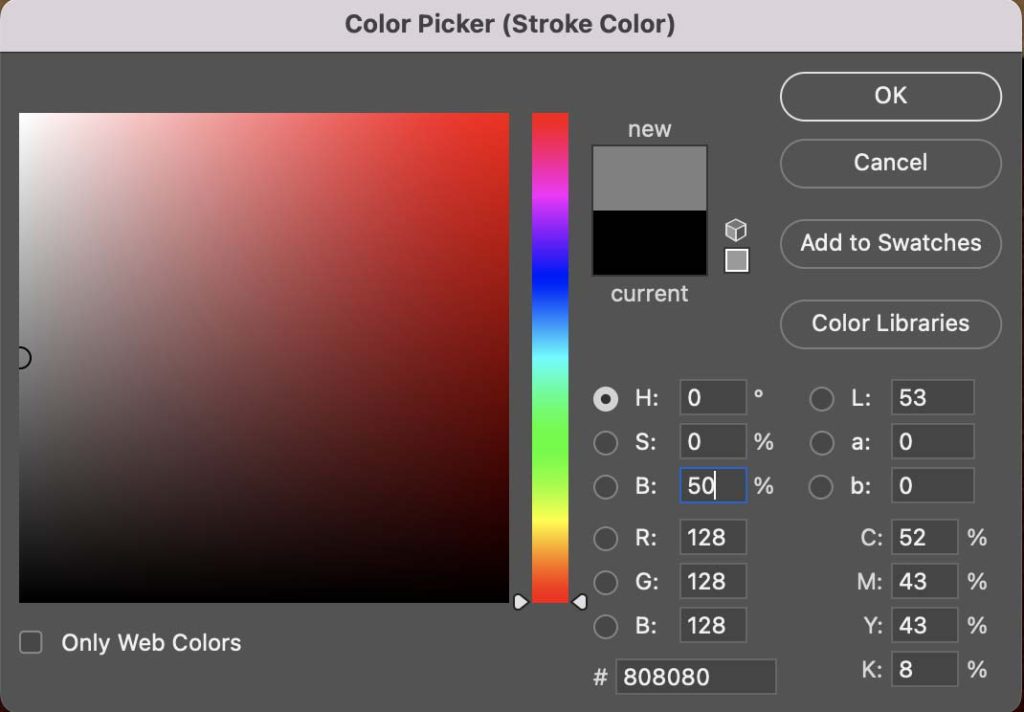
C) Add a keyline for good form by clicking on the “fx” menu at the bottom of the Layers panel. select “Stroke” to bring up the “Layer Style” panel as shown below.
- Size: 1px
- Position: Inside
- Colour: 50% grey
To change the colour click on the colour box show to bring up the Color Picker menu, shown right
D) Just “Save a Copy…”
- File name as per Club Requirements: Caps for Title + “by” + Author Name Capitalised
- Format: JPeg
- Check that the Colour Profile is sRGB
All done, super good. The PDI and the bit of the print that you see will match perfectly, and be exactly what you selected when you cropped it.
Slightly More Sophisticated Version
Replace step 4 above with:
- Select the image in the middle of the transparent pixels by selecting the rectangular marquee tool and clicking on the “Layer 0” icon
- Invert this selection (<shift><Ctrl>I on a PC <Shift><Command>I on a Mac) to select only the transparent pixels
- Expand this by 1 pixel for safety: Select -> Modify -> Expand -> Expand by 1px
- Edit -> Content Aware Fill… and just OK what comes up
You will now have a full A4 image, but the bit that you will see in the aperture of your mount will be your selected crop. What is hidden under the edge of the mount is the bit we have just created.
The Cool and Sexy Way
This works with any shape image in any shape or size aperture. However, it does work best if the image and mount aperture are broadly the same shape, and works particularly well, if you cut your aperture to fit the image.
- Keep the crop exactly as you want it; be that Portrait, Square, Landscape or Panoramic; but check that you have no hidden pixels, i.e., ensure that the “Delete Cropped Pixels” box was ticked when you cropped the image, otherwise they will reappear when we expand the canvas in step (3)
- Change the Image Size to roughly 90% the size of the Aperture, or the size you intend to cut the aperture
- Change Canvas Size to the size of your paper
- Put a Solid Color layer, set to pure white, underneath the image layer. Select the Image layer and use the “fx” menu to add:
- Stroke:
- Size: 2px
- Position: Outside
- Blend Mode: Normal
- Opacity: 100%
- Color: Black
- Drop Shadow:
- Blend Mode: Normal
- Color: Black
- Opacity: c. 50%
- Angle: 135%
- Distance: 10
- Spread: 10
- Size: 15 (Experiment with these last 3 parameters to see what looks best
- Stroke:
- Save a Copy As, just as above
This will produce a printable version that will fit within your aperture with a little bit of white around the image, and will give a subtle impression of the image floating above the background.
Do NOT save this file – instead follow the instructions above to create a PDI file, bearing in mind that for wide landscapes the constraint on size may be width, rather than height.
Final point: if there is anything you don’t understand, please put a comment in the box below. I can then update this post, and it will help everybody. Thank you.